
Rust is a popular multiplayer survival video game that has been going strong for over a decade. Facepunch Studios released the game in early access in 2013, followed by a full release in 2018. Interestingly, despite being a game where players rely on weapons like guns, melee, and bow and arrow to survive, it received native crosshair support fairly recently. Crosshairs are crucial in such games, as they help players check where their aim is and improve accuracy. Their presence is even more valuable in a survival game where resources are scarce, hard-earned, and you have to make every bullet/attack count.
So, if you have been wondering how to add and use custom crosshairs in Rust, we are here to help. The game supports native as well as third-party options, and we will cover both.
Using Custom Crosshairs in Rust: The Native Way
Rust received native support for crosshair customization a few months ago. It helps you adjust various aspects of the crosshair like mode, style, spacing, and color as per your personal preferences or gameplay style. Before we move to how to customize the Rust crosshair, let’s make sure you have the crosshair turned on. This can be done by visiting the game’s Settings > User Interface > Crosshair and turning on the toggle if it is turned off.
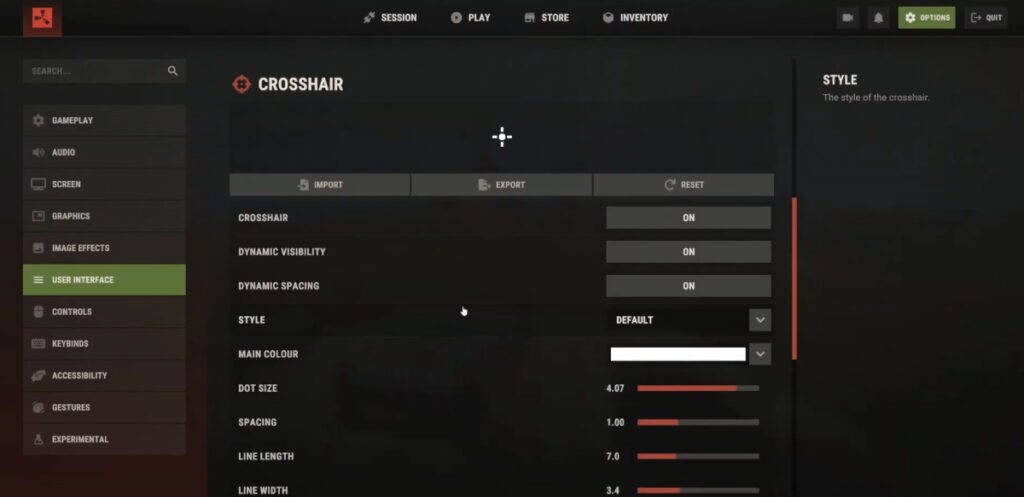
Right below the toggle, you will see two options: Dynamic Visibility and Dynamic Spacing. The first option hides the crosshair when you are aiming, alt-looking, or not holding a weapon. The second option changes the crosshair spacing dynamically to indicate the accuracy. Turn on these options if you want to use them.
Next up, go to the Style setting to choose the kind of crosshair style you want: Default, Dot, or T-Shape. You will see a preview of each style to help you with the decision-making. You can further choose the crosshair color, dot size, spacing, line length, line width, outline, and outline color. Play around with these settings to find the crosshair design and style that suits your preference and gameplay the best. My only advice is don’t make it too small or too large. This is because your crosshair should neither be so small that you cannot notice it nor be so big that you cannot see where you are supposed to shoot. Similarly, pick a color that makes it easier for you to spot the crosshair regardless of where you are aiming.
You must have noticed that the Crosshair setting also has Import, Export, and Reset options at the top. The Reset option resets all crosshair customization settings to the default. The Export option lets you generate a unique code for your chosen settings that you can share with others. It also helps when you are experimenting with different customization settings and saves you from the hassle of making those adjustments every time. Simply, save those codes somewhere and use them to implement settings with just one click. This brings us to the Import option, where you have to enter the unique code to apply customization settings.
Using Third-Party Custom Crosshairs in Rust
While native crosshair customization settings for Rust work great, you can also try third-party crosshair options on PCs. Crosshair X is one of the most popular third-party crosshair options for Rust. It is a paid tool, but it offers a free 7-day trial. It offers tons of customization options like line color, line length, line width, opacity, center dot color, center dot size, and opacity adjustment. You can also make adjustments to the firing animation for the crosshair.
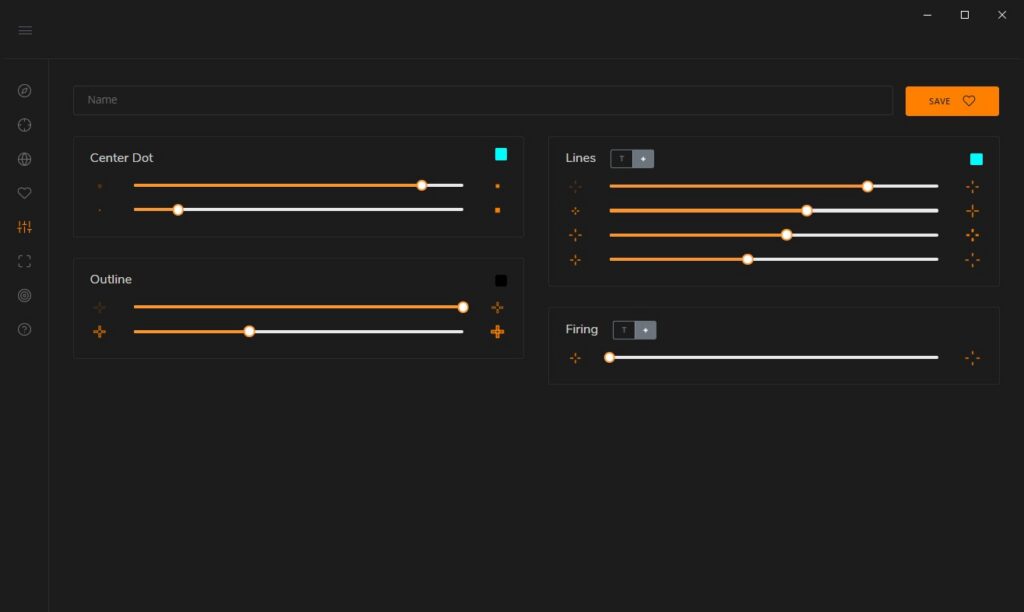
Launch Crosshair X on your PC, and you will be welcomed by numerous crosshair styles. You can pick any and even click on them to customize them further. Once you have found the crosshair you like, press Alt+Shift+Z to start using it. However, do note that this approach will work only when you are playing Rust in the Windowed mode. To use these crosshairs in full-screen mode, you need to follow a few more steps.
Visit the display mode setting in the tool and choose the Game Bar Mode. You will see a step-by-step guide to using Crosshair X crosshairs in full-screen mode. These steps are also mentioned below:
- Install the Crosshair X Game Bar extension on your PC.
- Press ‘Window’ key + G to launch the Xbox Game Bar.
- Click the Widgets menu in the game bar and choose Crosshair X Extension.
- Click the “Center” button and make sure to pin the extension by clicking the pin icon in the top right corner.
That’s about it. You should be able to use Crosshair X crosshairs while playing Rust in full-screen mode.

